I’m a Garden Designer!

The more observant among you will have noticed I’ve been dropping references to my sister site into the last few posts. This year I finished my post graduate diploma in garden design (with distinction, no less!) I’m now a fully qualified garden designer, and I’ve set myself up in business under the name Strelitzia Garden Design (from Strelitzia reginae, or the bird of paradise flower). Here’s my logo…

What do you think?

I have a new website dedicated to the business (www.strelitziadesign.uk) with a blog attached. For now, I’m running the two blogs in parallel, but I’m thinking of pulling the plug on ‘Pulling Weeds’, and merging all of my content on Strelitzia. I’ll keep you posted on that.

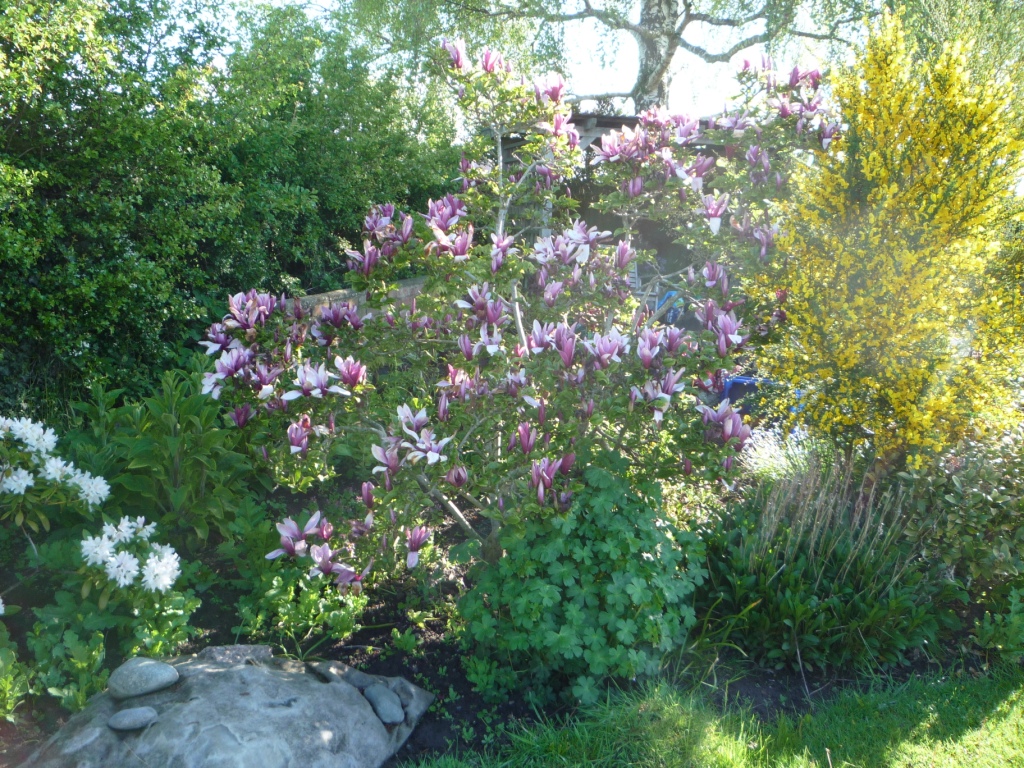
My design portfolio consists of the projects I did for the course, but I intend to gradually replace them with live projects. I’m also working up the design for my own garden as the main portfolio project, the advantage being that I will be able to illustrate it with photos from the garden (once I’ve finished building it) and also show how it develops over the years. Obviously I’ll have full access to my own garden – something I would be unlikely to enjoy with commercial projects. This is my colour visualisation of the concept plan…

As you can see, it’s a very full design, with a mini orchard, ornamental trees, shrubs, herbaceous borders, a veg plot (with compost bins), herb beds, a pergola for climbers, a greenhouse, and a wildlife pond. Just as well it’s a large plot! The beds are deep – up to three metres in places – to allow for plenty of plants. This is definitely a design for plant lovers! it’s a mix of the formal and informal. The main area of grass, under the fruit trees (apple, pear, plum and damson) will be a wildflower meadow. A formal grass path edged with low box hedging will lead up from the house, with straight lines and angular offsets to keep the destination (a patio, and an arbour under the large birch tree at the end) from sight until you turn into the final straight. You could say it defines a journey through the garden, adding an air of mystery (if you wanted to squeeze two design cliches into one sentence). This effect will become evident as the garden matures, and the plants become fuller.

This is the front garden…

The hedging, tree and shrubs on the south side were there already. The rest was gravel. Working around the existing driveway, the design re-instates the lawn that was there a few years ago, but this time as a wildflower meadow (with added cultivated bulbs such as tulips and alliums). A new beech hedge around the boundary will take away the harshness of the bare wall and fence, muffle noise, and help to filter the wind that blows in across the fields. Two new trees in the meadow – a rowan (Sorbus aucuparia ‘Eastern Promise’) and a field maple (Acer campestre) will provide more cover and interest at a higher level.

As you’ll know if you’re not new to this blog, I’m quite a long way through implementing the design, although there’s plenty left to do. The planting areas have been my priority; to get the plants settled in to their new home so they can get growing. The front garden is done now. In the back, I’ve just got two more beds that I’m working on at the moment. The hard landscaping of the paths and patios will have to be done as and when.

It’s becoming more difficult to get work done outside now that there’s so little daylight, and the weather is either too wet, or too frosty to work. Progress has slowed down somewhat. But if I can get all of the beds made and planted before spring, I’ll be satisfied with my progress.

text & images ©Graham Wright

Dragonflies…

A few weeks ago we started to catch glimpses of a fairy form flitting around the wildlife pond – a large, bright blue dragonfly. I went out one day to try and capture it on film (well… SD card actually, but that doesn’t sound the same)…

One of my customers is a dragonfly expert, and by my description identified this as a ‘Wide-bodied chaser’, Latin name Libellula depressa (though there was nothing at all depressing about seeing it – just the opposite). The blue abdomen means it’s a male. I’d like to think it emerged from our pond, but I suspect it was a visitor. I didn’t see a corresponding female, which is a shame – it would be nice to have one lay eggs in our pond. And then I saw this, which was rather easier to approach, and so get a picture of…

This is obviously a different species (though I didn’t identify which species). Two dragonflies, of different species, in the garden at the same time – I’m very happy with that. Maybe this one was a female, and has laid eggs.

Creating the wildlife pond, out of what was previously a Koi pond, was hard work, but worth it for the joy of seeing all the creatures flitting around. There are water-boat men, pond skaters, aquatic beetles, and still quite a few tadpoles, some of which may be for toads and newts; as well as the tiny frogs that were once tadpoles and are now hopping about in the garden. The birds love the pond too, from sparrows to starlings to crows, whether for splashing about or for a drink.

Water adds something special to a garden.

text & images © graham wright 2021

Spring moves on…

The weather hasn’t been conducive to growing this spring – a prolonged drought, late frosts, followed by heavy rain, with temperatures continuing to be disappointingly low for the time of year. But in my garden as much as elsewhere, the plants are getting on with it regardless. One of two new apple trees, this blossom is on Worcester Pearmain. Blossom on the other (James Grieve) is all but over…

I planted two purple hazels (Corylus maximus ‘Purpurea’) as focal points in the main bed. The dark leaves make a great contrast with the various shades of green, and particularly with the variegated plants, such as the grass Phalaris arundinacea ‘Feesey’ (known as ‘Gardeners’ garters’).My hazels are still only just over 2 feet tall, but they are going into their second season now, so should hopefully start to put on some growth. Both are fully in leaf now…

I put in lots more bulbs last year. Various tulip varieties have done their thing and are ‘going over’ now, but the alliums (Allium hollandicum ‘Purple Sensation’, and Allium christophii) are just coming out…

I put some of these into the miniature wildflower meadow in the front garden too. A bit cheeky, as they aren’t wild flowers (not in the UK at least), but I thought they would add some sparkle. A few have expired – some of the soil there is more builders sand than soil – but most have survived. I’ll post pictures next time (the meadow is beginning to look good).

Another plant used to add early colour is wallflower (Erisymum). They’re biennials,as opposed to annuals, which means they grow foliage one year, sit out the winter, and then flower early the next year…

I think of them as slow annuals – they don’t have time to grow into a mature plant and produce flowers in one year, so they have to struggle across two. And boy do they struggle. The plants come ‘bare-rooted’, and in my experience are never in great shape, which doesn’t help them to establish. You can grow them from seed, and while I’ve never found the time or been sufficiently organised to do this, I suspect it would give a much better result. Pretty and colourful as they undoubtedly are, they create problems. In theory, they do their thing, then you rip them out in time for the perennials (as well as any annuals you want to put in) to take over. In reality, the wallflowers go on for long enough to get in the way. Plus, some of the plants don’t stop at all, and even survive into the following year. Great, but they tend to look a bit scruffy, a bit ‘leggy’. You need to be ruthless, and pull them out as soon as you need the space, even if they’re still looking good. But for a plant lover (and an environmentalist) it can be difficult to do.

What you’re looking at above is a beech tree, even if it is small as yet. It’s Fagus sylvatica ‘Dawyck Purple’. Closer to the house, and in the same bed, is the green version (Fagus sylvatica ‘Dawyck’!) These will eventually make very tall trees, but with a narrow profile. A mature beech would eventually take up most of the garden. With the Dawyck varieties (there’s a ‘gold’ variety too) you can have more than one and yet still have a garden. I do love a beech tree.

This magnolia was here when we arrived. I’m not sure of the variety. I thinned it out last year, because it was very congested. Sadly the flowers get hit by late frosts every year. This is a cold, exposed area, but I’m hoping that in years to come it may be more protected by the plants around it, as they increase in size…

The broom next to it is spectacular, but to me, the colours clash. It’s also in the way of what on my garden design is a grass path, so it will have to go. The roots on broom appear to go straight down, so getting enough out to transplant it isn’t feasible. Fortunately there is another large specimen by the pergola. That one is a lighter, more subtle yellow, and is much more fragrant.

The ‘landscaping’ is continuing slowly due to other commitments (like work!), so you may notice random piles of brick or rubble, or covered heaps of lifted turves. Forget-me-nots have settled in to this little semi-wild area. I’ll let them set seed and then sprinkle them around the garden to add to next year’s supply of plants-for-free

With all the rain we’ve been having, the wildlife pond has finally filled up. I had to make some minor adjustments to the edge levels so that it over-flows into the bog garden at the front. The water is still beautifully clear, and I have to put my hands up and admit to not knowing why. It cleared after I put some bunches of rosemary into the water, but I tried the same trick with the holding pond for the fish, and it didn’t work. I’m not complaining though…

The garden is slowly coming together, and many of the plants that have been languishing in pots for too long are now in the borders. But some are still waiting. The new shady border at the back of the house is yet to be dug. That will have to wait until the builders have finally finished and gone (which is way overdue!) Among the plants that will go in that border are these ferns, Polystichum polyblepharum. I potted them on so they could bulk up prior to planting. They too have suffered with the weather, but they’re coming on now…

The weather shows no sign of warming up just yet. But from the forecast, it looks as though we could just have seen the last of the frosts. The garden is really beginning to grow. I’ve got seedlings of annuals, perennials and veg coming on, including more tomato and chilli plants than you can shake a stick at. And I’ve booked a trip, in mid-June, to visit the new RHS Bridgewater garden in Salford, the prospect of which fills me with excitement. Expect a review on this blog in due course…

text & images © graham wright 2021

Making a Wildlife Pond

I’ve previously written about the pond we acquired when we moved house. It started life as a very deep, formal pond for Koi carp, but we’ve been transforming it into a home for wildlife. The liner had to be replaced, as I think it was leaking (and I wanted to re-shape the pond and reduce the depth too).

Late January – the liner is in place, with a layer of underlay over the top, and the pond is ready to be filled.

To protect the liner, I put the old underlay into the hole, and then a layer of new underlay over it. Next was the liner itself, followed by another layer of underlay over that. I know this sounds strange – it’s called underlay, not overlay after all; the clue’s in the name – but the idea is to protect the liner from being damaged by anything sharp that might be put on top, such as plant pots, bricks and slabs for raising up water lilies, and any stones or sharp objects that might be in the soil you put in for marginal plants.

I wanted to get it right, so I followed instructions in a book called ‘The Water Gardener’ by Anthony Archer-Wills, apparently a very respected figure in the industry. The book isn’t always entirely clear on the details, and I’m not convinced about some of the construction methods – more on that later. This is the pond the next day, when snow and cold weather stopped play…

You can see I built a shelf for planting all the way around the perimeter, and bricks along the edge of the shelf to stop the earth collapsing. In the deep section there are two slabs, supported on bricks, for a water lily and a water hyacinth.

The start of February – the shelf has soil on it, and has been planted up, and the pond is nearly full

By the middle of March, the frogs had moved back in, and had started laying frog spawn…

I think I got the pond filled just in time. Last year I think most of the tadpoles were eaten by the fish, but they’ve been relocated elsewhere, so the tadpoles should have less predators this year. Panning out, this is what the pond looked like at that time. You can see we’ve planted the far side with some dogwoods: Cornus sanguinea ‘Midwinter Fire (times 1) and Cornus alba ‘Sibirica’ (times 2). It needs more, but I’ll take some cuttings this year, and try to be patient

The water got cloudier and cloudier, and a scum of green algae formed on the surface – it didn’t look very appetising. Something had to be done. Rather than spending a fortune on bags and bags of aquatic compost, I had just used garden soil on the pond shelf – which is, I believe, as the book directed. I wondered though – could all the nutrients in the soil mean that the pond would inevitably remain scummy?

I remembered reading that putting bunches of lavender in a pond will clear the water. Obviously, at that time, there was no lavender to be had. So instead, I tried rosemary. I couldn’t imagine it would work. But, amazingly, it did – after only a week, the water had cleared, and the algae had disappeared. Surprisingly, the water has got clearer and clearer. So much so, you can see right down to the bottom. And the tadpoles have now hatched….

The water may be clear, but there is a bit of a problem with the level – it’s going steadily down. I’ve been emptying a water butt into it now and then, but that’s not enough. I think the problem is that the water is wicking out and over the sides via the layer of underlay over the top. The book did say you might need to have a system to top up the water, but it’s just losing too much. Mains water isn’t great for topping up a wildlife pond (and the supply is too far away anyway). There’s only so much rainwater you can collect. I’ve already got three water butts, but the water in those will be needed for watering plants when the prolonged dry spells arrive. Here is the edge, with the underlay lapping over and tucked into the soil around the pond…

To stop the water loss, I’ve cut away the under (over?) lay so that the liner, which of course isn’t absorbent, is exposed. The next problem is how to hide the liner. I’ll have to top up the soil on the ledges. Hopefully the plants should hide most of it once they’ve grown up. I may just need to put some stones around the edge too…

Don’t let anyone say I don’t fill this blog with pretty pictures! To the left (front) side of the pond the liner dips down and extends under the width of the bed to create a bog garden for plants that like damp soil (Ligularia, Rodgersia, Hostas, Iris sibirica, etc.). I’ve left the under (over!) lay on that side because I want the water to over-flow into that bed when there’s been a lot of rain. I’ve also run a pipe from the down-pipe on the side of the workshop where there isn’t room for a water butt. So the rain that lands on that face of the roof feeds straight into the pond. Hopefully that will fix the problem with the water levels. This is how the pond was looking a few days ago…

The water hyacinth is flowering nicely. You can see the water level still needs to come up somewhat. Hopefully that will happen in time. We’ve planted up the bed on the left of the pond with damp-loving perennials (from Claire Austin, as well as Ligularia seedlings and Iris divisions that we brought with us from our previous garden). They’re not showing much as yet – hopefully they will put on some growth over the summer. We’ve got tadpoles, water beetles and water boatmen. It might take a few years, but I can’t wait until there are dragon flies and damsel flies skimming back and forth over the surface all summer long…

Text & images © Graham Wright 2021

Draining the Swamp…

Well, the pond, actually; but hopefully I got your attention! I’ve turned what was once a koi pond, with clear water (provided by some very elaborate filtering equipment) full of colourful fish, and with a rather twee wooden bridge crossing over it, into something horrible.

But as the saying goes, you can’t make a souffle without breaking wind. No, that’s not it… Omelette! – I meant omelette. The fish were taken away before we moved in last year. I stopped using the pumps because I’d seen newts in the pond, and read they can be drawn into pump impellers and killed. The water turned cloudy, only slightly ameliorated by first, barley straw, and then lavender clippings.

The pond pumping equipment – looks complicated. If anyone wants it, let me know!
This is the end that goes in the water

You might wonder why I’m bothering to empty the pond. Well, firstly, I suspect it’s leaking, because the level never stays up; there’s always a few inches of the liner showing, which isn’t attractive. Secondly, the shape isn’t ideal. It’s 90cm deep, which seems excessive to me, and the figure of eight doesn’t look right for a wildlife pond (which is what I’m aiming for). And I want to put in different levels for different plants, ideally with the ledges filled with soil to plant directly into, rather than resting plant pots on.

The newts are all out of the water for the winter now (I’ve encountered quite a few while working in the garden – a sharp eye and a great deal of care is required to avoid casualties). Which is good, because it meant I was able to use the pump to get the water out. My attempts at syphoning the water had failed miserably. Apparently you need the end of the hose to be lower than where you’re syphoning from, which wasn’t possible in this case. Using a bucket would have been back-breaking work and taken forever.

The pump got most of the water out, but I’m having to scoop out the rest with a bucket, which isn’t easy. I put a garden fork through the bottom, but the water isn’t draining out. There are lots of frogs hiding in the thin layer of silt on the bottom – as I come across them I’m transferring them to the temporary pond I set up…

I made the temporary pond 60cm deep, because it turned out there were fish in the pond after all – some must have escaped the net; presumably they were much smaller then. They’re shy creatures, spending most of their time near the bottom, but I’d counted four of them on the odd occasion when they rose to the surface, and that’s how many there turned out to be. Only one has orange colouring, the rest are plain, and I’m wondering if, rather than Koi, they’re actually just river fish – though I’ve no idea how they came to be in the pond (maybe they’re flying fish!) Perhaps, like many plant varieties, Koi carp don’t breed true from seed.

I won’t be putting them back in the main pond when it’s ready because, as I’ve said already, it’s going to be a wildlife pond, and the fish will eat the wildlife. I’ll either have to make a separate pond for them somewhere, or find another home for them. Fish and chips, anyone? (only joking).

I’ve started taking apart the waterfall behind the pond…

While the fibreglass waterfall sections looked quite realistic – almost like real stone – they’re not really my style. I’m intending to level ‘the hill’ and plant some dogwoods (Cornus) species in it’s place, to make a backdrop to the pond. With their coloured stems they should look very impressive in the winter. So far, I’ve got one Cornus alba ‘sibirica variegata’ which is a cutting from a cutting, from a cutting, which has bright red stems in winter; and one Cornus sanguinea ‘Midwinter Fire’, which came as part of an order from the excellent Burncoose nurseries earlier this year. I put it into a larger pot to grow it on ready for planting out (hopefully) this autumn. I’ve not grown Midwinter Fire before, but even in a pot, sat on earth in the middle of a garden construction site, it looks wonderful…

Actually, the photograph doesn’t do it justice. The gradient from orange through to red makes it glow as if it’s on fire. This effect can be achieved with other shrubs… but only by setting them on fire!

I found the remains of the wasp nest under the waterfall; beginning to decay, with just a few, sleepy wasps left alive…

I’ve levelled the area to the right of the pond, between the pond and the wooden workshop building, and begun to plant it up. The main feature is an Acer griseum (Paperbark maple), a seedling from the garden of one of my customers. This is a small tree, often grown multi-stemmed, and renowned for its bronze-coloured peeling bark. In the autumn the leaves turn all sorts of shades of red, orange and yellow – quite spectacular. To the right of it is another shrub from the Burncoose order; Hydrangea paniculata ‘Limelight’; also potted on to build it up ready for planting. It’s filled with beautiful white flower clusters in mid-summer, which fade gracefully to the dried, brown heads that will stay on the plant all winter (they’re great for cut flower displays).

You can see the path that will meander around the back of the pond, made from re-claimed materials – edged with bricks on end, and filled with compacted rubble. A layer of slate chippings will finish it off (if it doesn’t finish me off first!)

So, as you can see, I’ve been busy. But there’s a lot to do yet. I’m continuing to dig out the honey fungus rhizomorphs that have spread throughout the garden. Opportunities to work in the garden are reducing as there are less and less daylight hours, and it gets colder and wetter. A few trees and shrubs are still holding on to their leaves – one of our pear trees, for instance – but most are now bare. I always find this a difficult time, and this year it seems worse than before. But even now there are signs of better times. Spring-flowering bulbs are just beginning to poke their snouts out of the soil, and I’ve noticed that the roses I planted just a few weeks ago are coming into bud. Buds are swelling on many of the trees, too – fat, juicy flower buds in the case of the magnolia, and rhododendrons in particular. It’ll soon be spring. We just need to get through what the poet Ian Mcmillan refers to as ‘the long dark corridor of winter’…

text & images © graham wright 2020